

Reel Styling Wednesday | Week 1
This week kicks off our “Reel Styling Wednesday” series! Hopefully this series gives you the confidence to style your own home. We are starting with console styling; this can be done in an entryway, a hallway with enough space, or any blank wall in a room.

I have had many clients mention that they love neutrals and “don’t want to use any color”. It’s important to note that just because we love color here at Vive Workshop, it doesn’t mean we cant work with neutrals. Sometimes I add interest with layering neutral patterns, but not everyone likes pattern. The key pieces to adding interest in an all-neutral space is layering texture and tones.
You’ll notice, over the course of this series, that styling is not black-and-white. There are no hard and fast rules. I usually have a few go-to ways to style and allow myself to edit from there, so these steps are the way I achieved this look.
STEP 1: MAIN BASE PIECES
This is sort of a two-part step. Select your console and your rug because these are the largest pieces that will guide you. It’s possible to select your rug last if you prefer that method.
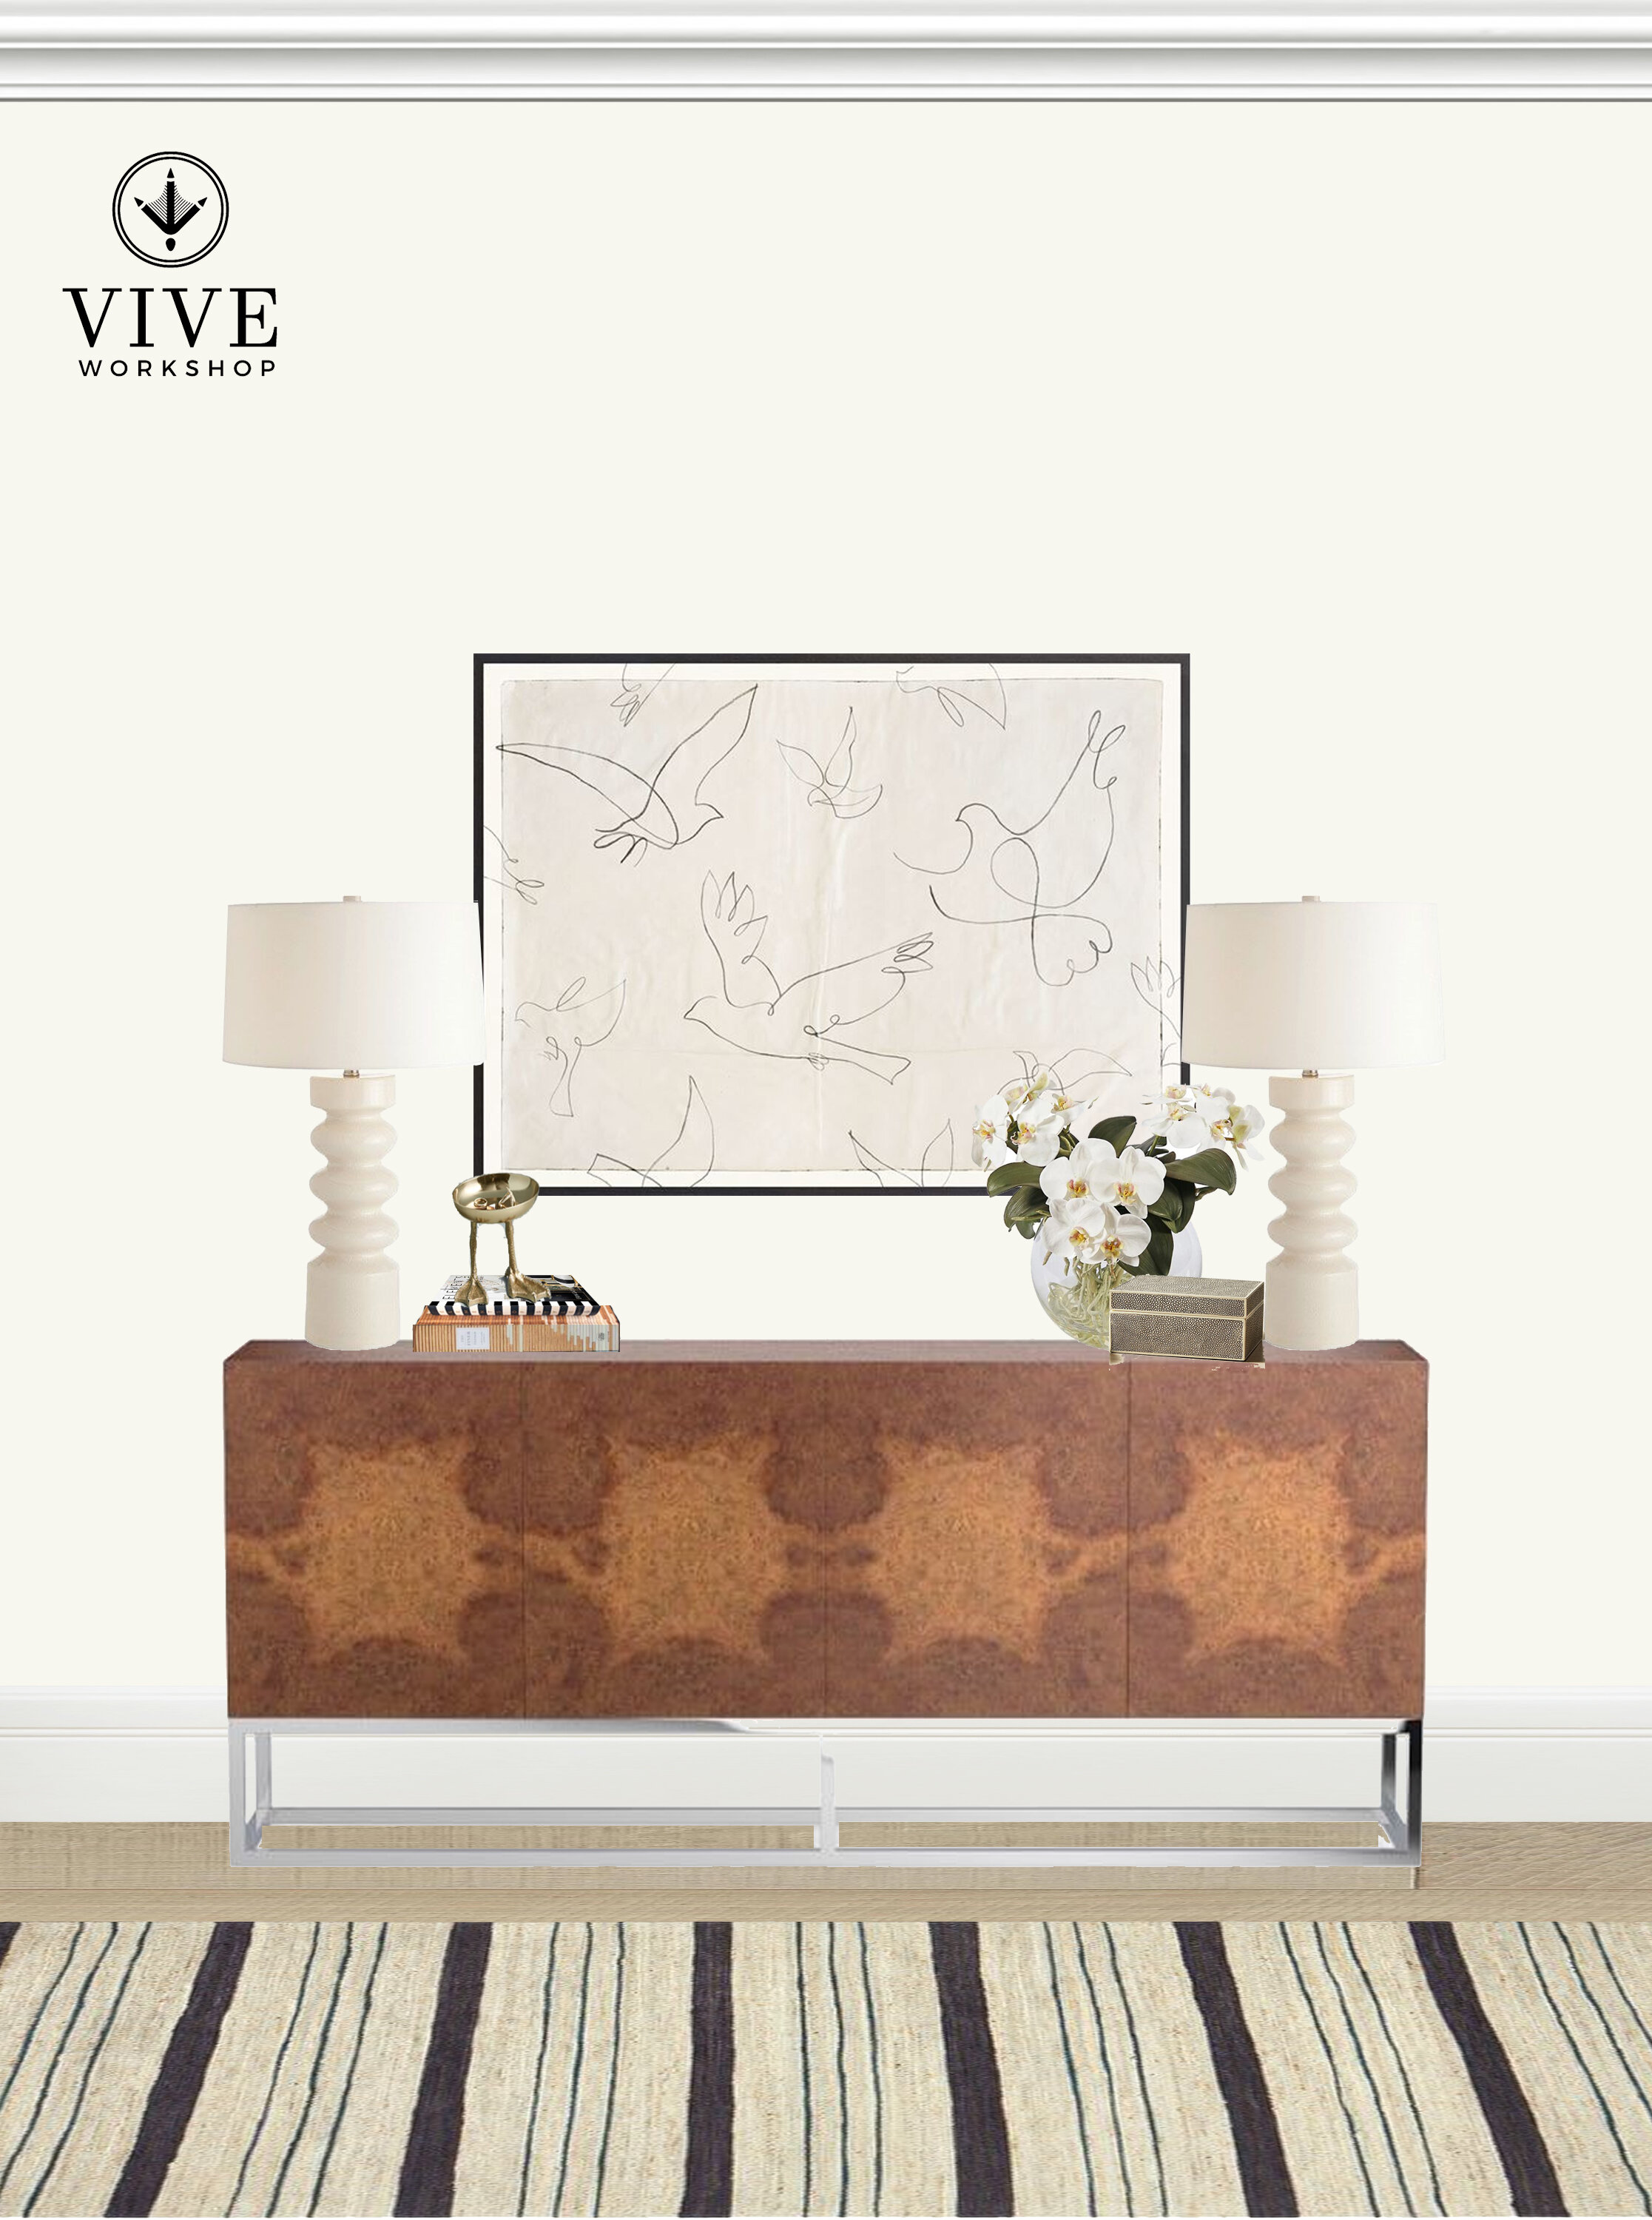
I selected a console that had a distinctive wood grain. Because that “pattern” was more organic, I juxtaposed it with a linear rug. A woven textural rug with natural color variations and striking black lines run into the warm wood console with a burl wood pattern.

STEP 2: ASYMMETRY VS. SYMMETRY | art and lamps
This is where you’ll have to make the decision if you like symmetry or a more relaxed, asymmetrical vibe. The size of the console can make this decision for you. If it’s smaller, you will only be able to fit one lamp.
For this styling, I chose symmetrical. The art art was the main basis for this decision; it was a large, landscape format. I love the hand-sketched quality and wanted it’s simplicity to be the focal point. The large console also allowed for two lamps so I chose white lamps with a glossy wave; again layering textures.
STEP 3: LARGEST ACCESSORIES
In this step you’ll start layering in accessories. I start with my tallest pieces; most of the time these are my plants/florals. I like to add a “natural touch” to my styling because if softens the composition.
I also start adding pieces to stack and create taller pieces. I usually do this with books in the color scheme I’m going for, boxes, or some type of acrylic/marble pedestal.

STEP 4: FINAL ACCESSORIES
I try to do groupings when styling. I’m also a firm believer that negative space is just a nice as the items I place on the shelf. While I could fill this whole console, I prefer to keep the center free of anything to frame the art.
Most of the time, odd numbers are best when grouping. On the right I added a textured box to keep less attractive trinkets. On the left, I added a metallic finished, footed bowl for entryway keys. The feet on the bowl add some personality. I love finding sculptural pieces that add a little quirkiness and a little extra shape to the whole.

I hope you enjoyed week 1; look forward to more every Wednesday!
-NIKKI